Showing posts with label DIY jewelry. Show all posts

Friday, October 10, 2014

Wire Wrapped Fabric Beads - DIY Jewelry Tutorial

DIY Beads


bead tutorial

These beautiful wired wrapped fabric and ribbon beads are so fun and simple to make and look like expensive art or glass beads!  They are just made from scraps of fabric, ribbon, yarn  and wire with seed bead assortments I got from Auntie's Beads:

seed bead mixes
Miyuki seed beads mixes in assorted sizes from Auntie's Beads


scrap fabric
Scrap fabric, ribbon and yarn
Supplies:

1) Assorted scrap fabric, ribbon and yarn; look for cool textures with shimmer!
2) Assorted wire in all colors ( I like Artistic wire from Auntie's Beads) from 20 gauge to 28 gauge.
3) Seed Beads, I like Miyuki seed beads mixes in mixed sizes from Auntie's beads.
4) Tacky glue

Tools:

1) Wire cutter
2) Bamboo skewers


Step one:
bead tutorial


Start wrapping your ribbon or fabric strips around a bamboo skewer.  Here I used sheer 2" wide ribbon that has wire in it and is about 9" long. The wired ribbon is very easy to work with because you can mold it to shape.  For fabric,  I use 1" by 6 to 9" strips; it just depends on how thick the fabric is and how big of a bead you want. You can either add more or cut any excess off if necessary. You can use a combination of fabric and ribbon, lace and even wrap yarn!  If you are not using the wired ribbon,  pin your fabric to hold it together:


ribbon beads


fabric bead tutorial


Step Two: When you get the shape you want, take a yard of wire and tie or twist it around the center of the bead. Then add a few seed beads as you wrap the wire around:


how to  make fabric beads


 Keep adding beads and wrapping until there is about 4" of wire left then loop it though a seed bead  near the edge a few times to hold and then I like to coil the rest of the wire around the skewer at the end:

handmade beads
Loop the end of the wire though a bead a few times to hold.

Then repeat, adding beads to the other half of the wire. Sometimes I need to add more wire and beads. You can squish the bead and shape it to make it tighter as you are wrapping. When I am finished I like to remove it carefully from the skewer, sliding onto a head pin or eye pin with a small bead cap,  adding a dab of tacky glue to the ends so it wont unravel.  I have also cut the skewer and left it inside the bead and wrapped the excess sturdy 20 gauge wire around and formed loops to hang. (see purple bead below) You can also start with a paper coffee stirrer straw instead of a skewer and glue your fabric onto that but I didn't want to raid Starbucks just yet!


handmade bead
 I used 20 ga wire and wrapped ends and made loops


art beads


fabric bead dangle earrings
Find my fabric bead jewelry in my Etsy Shop

Be sure to check out my Etsy shop frequently for more fabric bead jewelry or fiber art and even necklaces will be coming soon!

Do you like this tutorial, is this something you could make? Comments welcomed :)


Sunday, September 28, 2014

DIY Earrings - Jewelry Tutorial for Beginners

DIY earrings


DIY Bead Dangle Earrings; Beginner Jewelry Tutorial.
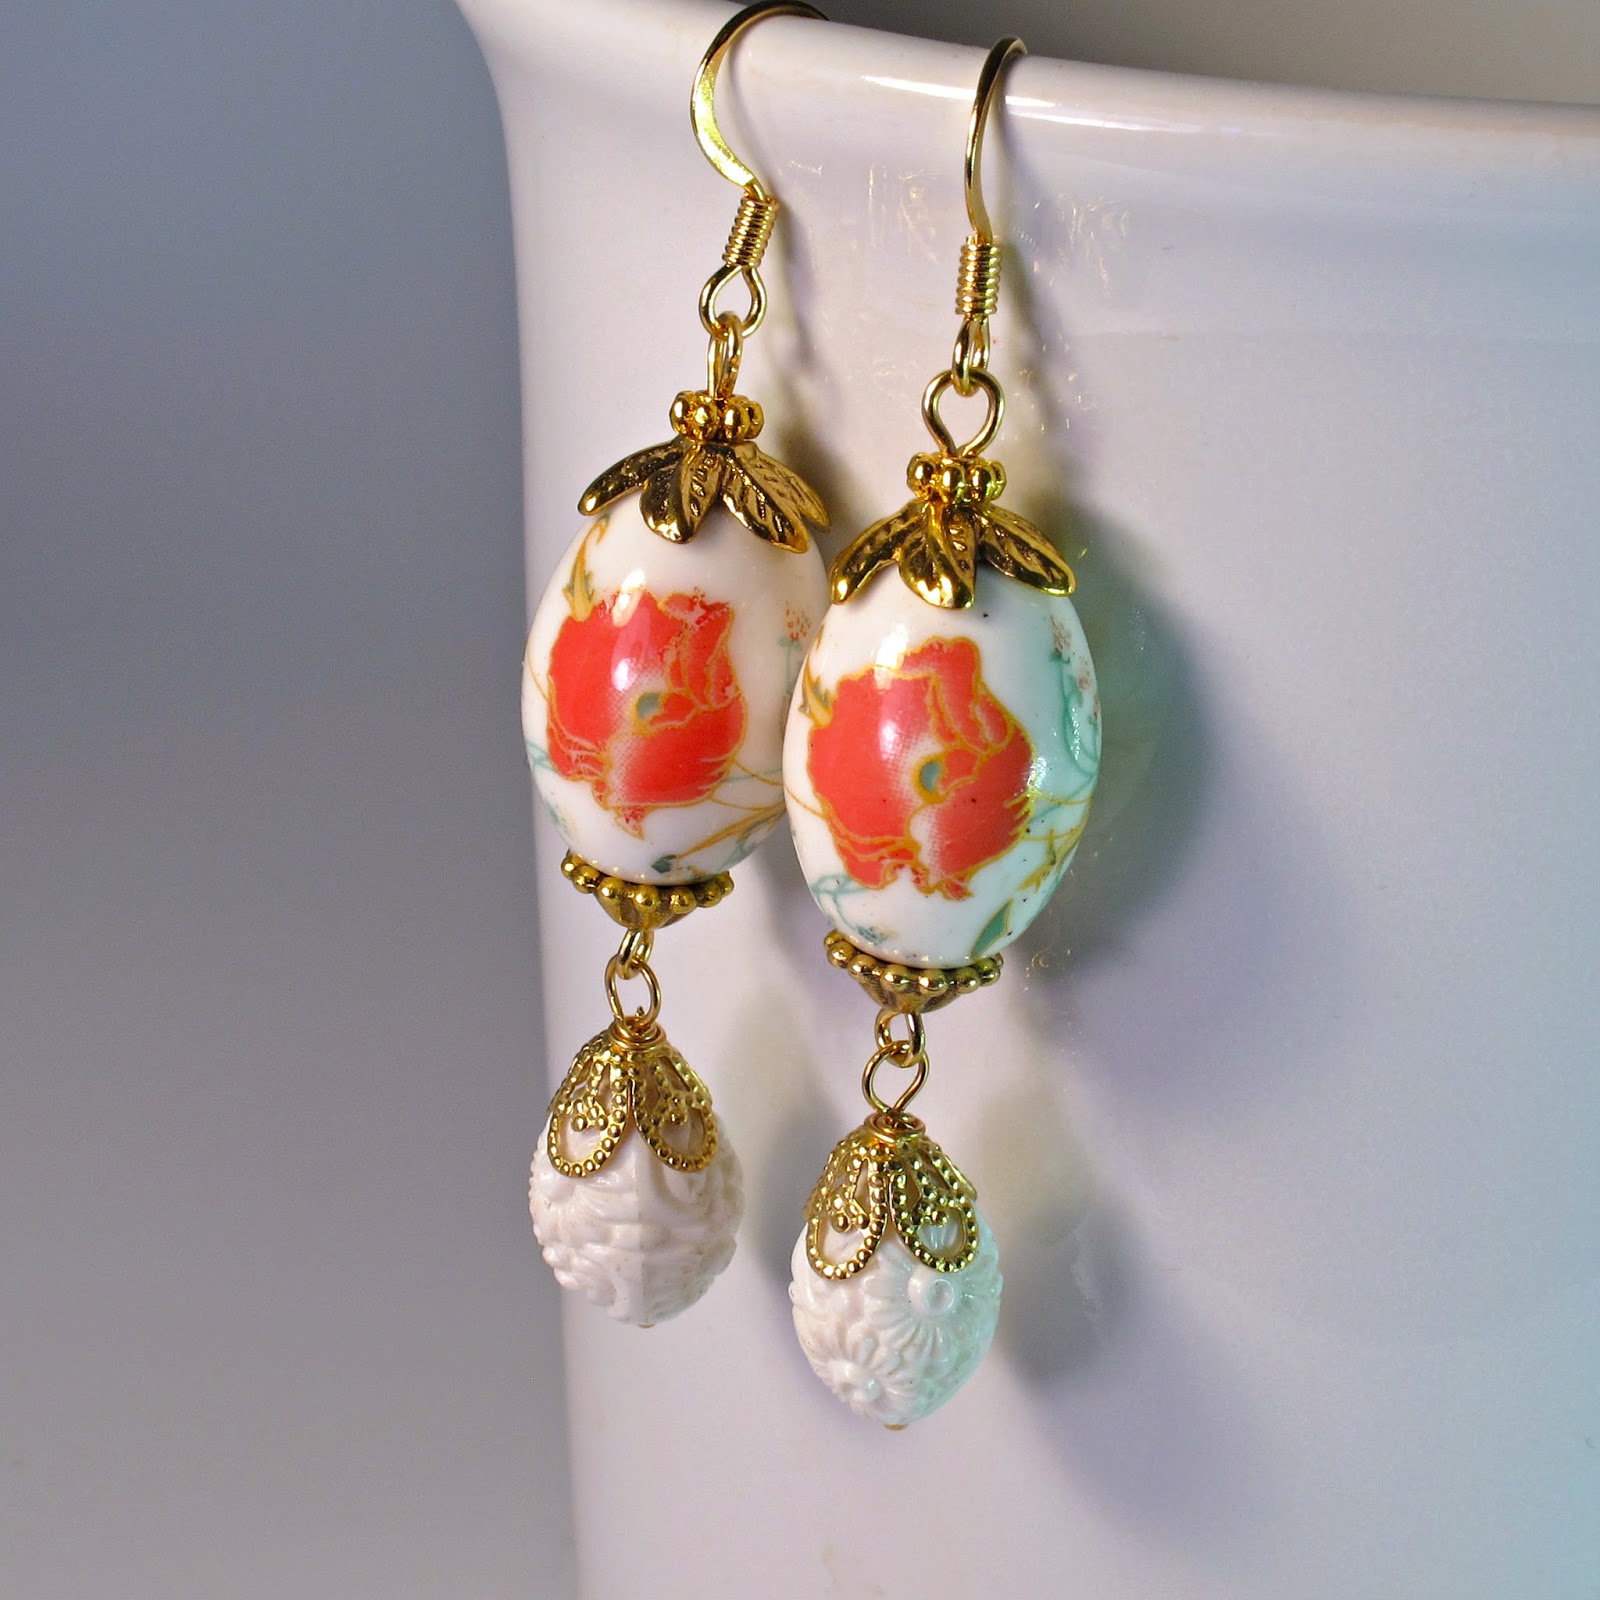
I found these gorgeous floral porcelain beads at The Beadmixer so I just had to get them along with all of the findings to make these great bead dangle earrings.  This tutorial should be easy enough for a beginner plus I have a unique tip for even an advanced jeweler! Sometimes it is difficult to figure out online what size bead cap will really work for certain beads so I have links to most all of the bead caps and items used.


Tools:
Needle nose pliers
Flat nose pliers
Wire cutters
X-acto knife
Sharpie

Materials:
18x14mm oval porcelain beads
Ear wires or hoops of your choice
gold flower bead caps
bead caps 8 mm
8-10mm Czech glass beads  (I had these 10mm tangerine beads already)
1" head pins
2" eye pins
Florist tape


Step 1: Add your  8-10mm  Czech glass bead to your 1" head pin  then add the 8mm bead cap and bend the wire almost 90ยบ : (there are many helpful youtube videos)


DIY earring tutorial

Step 2: Take your needle nose pliers and make a loop, you can cut it off here or continue wrapping the wire around and snip the end. Then take your flat nose pliers and squeeze or bend to make the loop straight :


earring tutorial


Step 3: Take your long 2" eye pin, open it up with your flat nose pliers and add the bead dangle and close the loop and straighten out any bends in the pin with your flat nose pliers:


DIY earrings


Step 4: Add the larger flower bead cap then the bead and mark the spot where the bead ends:


large hole bead tips

beading tips


Step 5: Remove the bead and take 3" of florist tape (****this is my trick to keep the large hole beads from wobbling and turning!*** ) starting at the mark, wrap the pin with the tape down towards the bead cap. This does not have to be perfect. Then roll the tape between your fingers to make it tighter and smooth. Then slide the bead on, it should be tight but if it is too tight just squish the tape tighter. Make sure no florist tape is sticking out of the bead cap, if it is just slide the tape up. If the bead is still loose you can add a little more tape at the top and push it in with an X-acto blade:


beading tip
Tip: add florist tape to keep large hole beads from wobbling

large bead hole beading tips
Fill hole with florist tape using a point or X-acto

Step 6: Add either another leaf flower cap or the 8mm bead cap then make another loop to hang your ear wire. Open up your ear wire with flat nose pliers and add the earring and close up the ear wire then make sure the loops are all straight. Hold the earring up and turn the bead so the best side is showing in the front. Repeat for the other earring so you have a gorgeous porcelain bead dangle earring set :


bead dangle earrings


https://www.etsy.com/listing/205100209/dangling-bead-earrings-orange-poppy?ref=shop_home_active_3


bead hoop earrings


flower earrings


Similar purple earrings made with antique bronze findings and beads from The Beadmixer:

8mm bronze bead caps
6mm bronze bead caps
8mm Czech glass beads in purple

Be sure to check out the great selection of porcelain beads at The BeadMixer, there are many more colors and shapes to choose from!


Buy all of these floral earrings and more at BluKatDesign on Etsy.

Follow my Pinterest board for more tutorials:  DIY Jewelry Tutorials


Please let me know how your earrings turn out. Comments welcome!


Thursday, June 5, 2014

DIY Duct Tape Earrings

duct tape crafts


Simple DIY Duct Tape Earrings
I've been on a decoupage kick lately but with all the layers of paper and glaze and more glaze and waiting for glaze to dry and waiting.... I wanted something quick! Then it came to me....duct tape!


duct tape earrings


 I have a bunch of these 1 1/2" wood discs that I need to use up. (you can find them in craft stores but I got mine online)  I first took a sharpie to the rims then sealed the entire disc with clear Krylon acrylic spray so they wouldn't warp and let dry.

DIY earrings
Use sharpies or nail polish to paint the rims!

 I tore off a small piece of duct tape or Duck Tape they call it and... BAM!  I pressed the duct tape on the disc then took a small sharp pair of scissors and trimmed. Even though it gets sticky, it was fairly easy to get a nice neat edge. I rubbed the edges on a dry towel to seal and to get the sticky stuff off and cleaned the residue off with rubbing alcohol. I drilled holes in my discs but you can use a thumb tack to make a hole, the wood is soft enough. Add some beads and ear wires for some really cool earrings!


duct tape crafts
Duck tape crafts


duct tape earrings

duct tape jewelry
Find these duct tape earrings in my Etsy shop!


 If you  like the look of these colorful earrings but don't want to make them yourself check out my duct tape earrings in my Etsy shop!

Be sure to follow my Pinertest board: DIY Jewelry Tutorials for more fun jewelry making ideas!


What do you think? Have you taken part in the duct tape crafting craze yet? Comments welcomed!